Connect a single AWS account
The cost, resources and savings recommendations of one AWS account appear in CloudYali after you create the CloudFormation stack CloudYali builds for it. Setup takes about five minutes. Use this path for a trial, a standalone account, or one account outside your organization; to connect a whole AWS Organization, see Connect an AWS Organization.
Before you start
- You need permission in the account to create IAM roles and policies, an S3 bucket and a Cost & Usage Report. Connect AWS lists what the stack creates.
- Have the 12-digit account ID ready, and be signed in to that account in the AWS console.
What CloudYali can read
| Data | Permission | Why CloudYali needs it |
|---|---|---|
| Cost & Usage Report files | s3:Get* and s3:List* on the report bucket only | Cost by service, resource and day |
| Cost Explorer, Budgets, Savings Plans | ce, budgets, savingsplans read actions | Per-account cost, commitments and budgets |
| Resource configuration | Describe*, Get* and List* across AWS services | Resource Inventory and savings rules |
| Recommendations | Cost Optimization Hub read actions | Cost Savings |
| CloudTrail events | cloudtrail read actions | Change history for resources |
Every permission is read-only; the full list is on AWS permissions.
Connect the account
-
In CloudYali, open Integrations and select Connect on the AWS card (Add account if AWS is already connected).
-
Under Do you use AWS Organizations?, select No — connect a single AWS account.
-
Enter the AWS account ID and an Account name of at least 3 characters, then select Continue.
-
Select Open in AWS Console. CloudYali also emails the same link to your CloudYali account email, in case someone else has access to the AWS account.
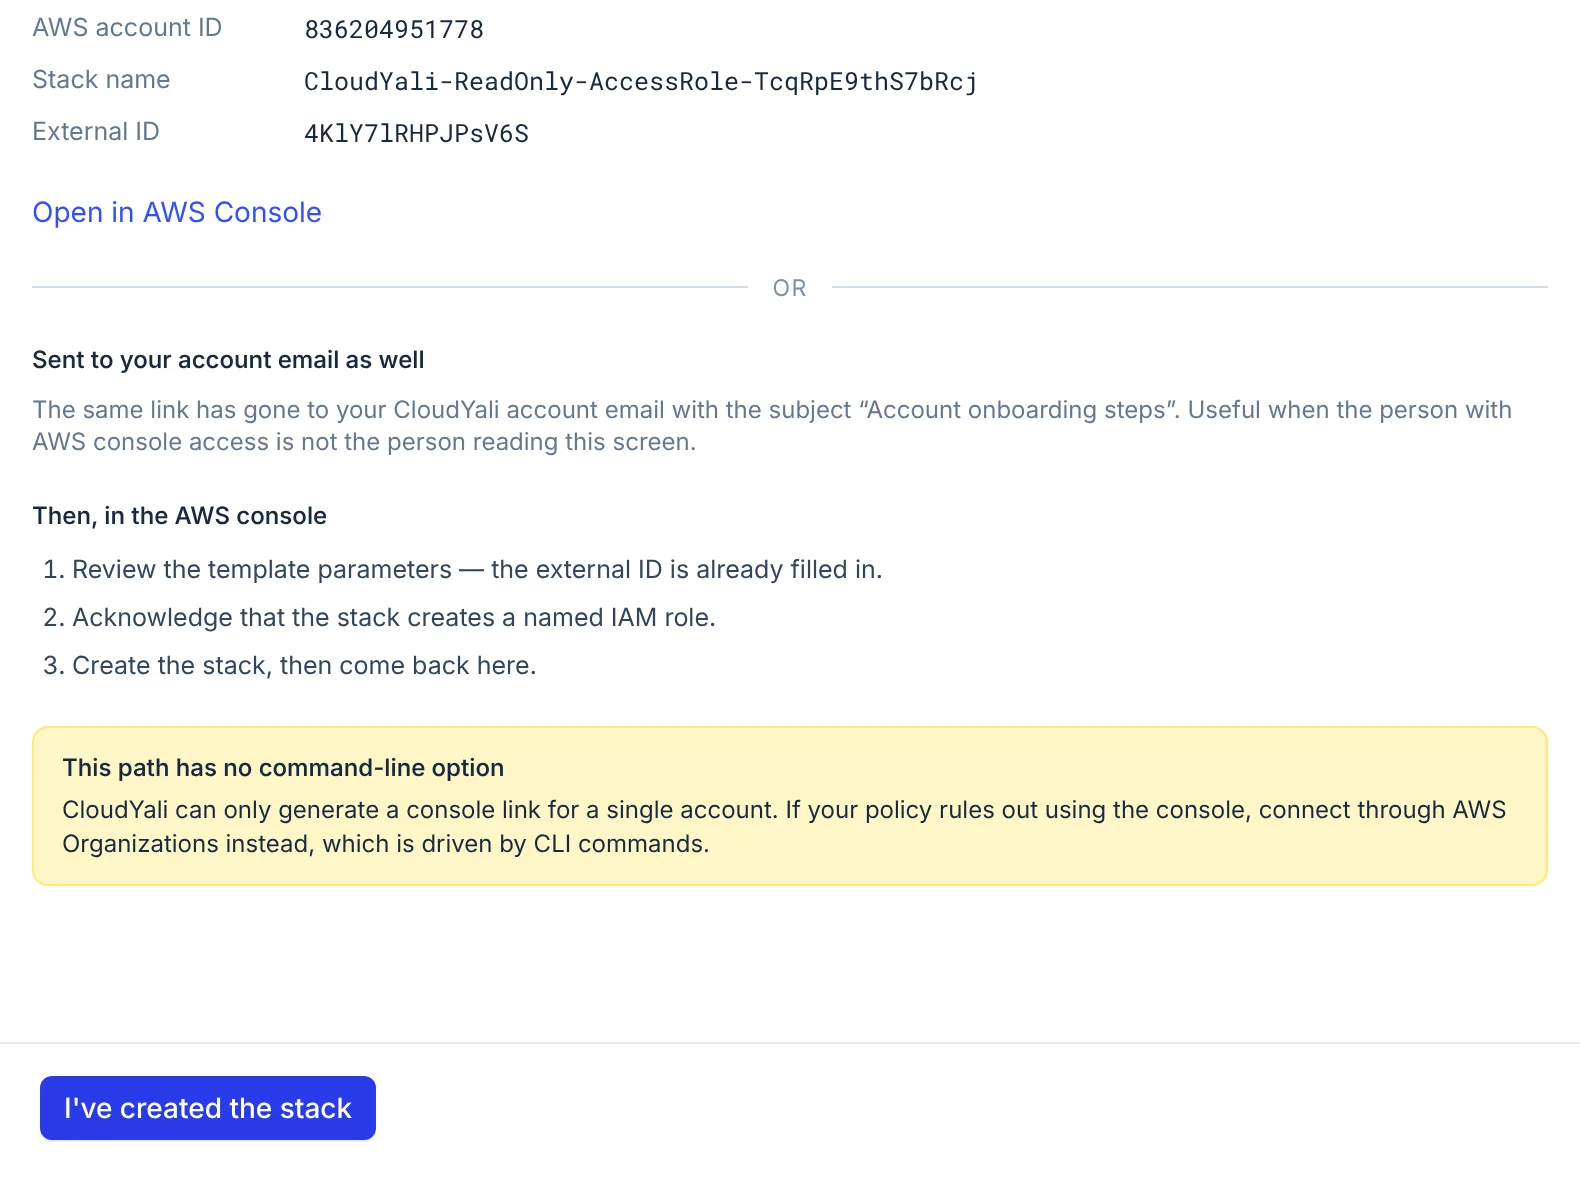
- Open in AWS Console
- I've created the stack
-
In AWS CloudFormation, review the stack. The external ID is already filled in; do not change it.
-
Select the box that acknowledges that CloudFormation might create IAM resources with custom names.
-
Select Create stack.
-
Back in CloudYali, select I've created the stack.
Check that it worked
The console shows Waiting for AWS to confirm the role while the stack finishes, which usually takes under two minutes. You can close the panel; the account still connects. When the console shows Connected, it lists the IAM role CloudYali assumes and the stack that created it.
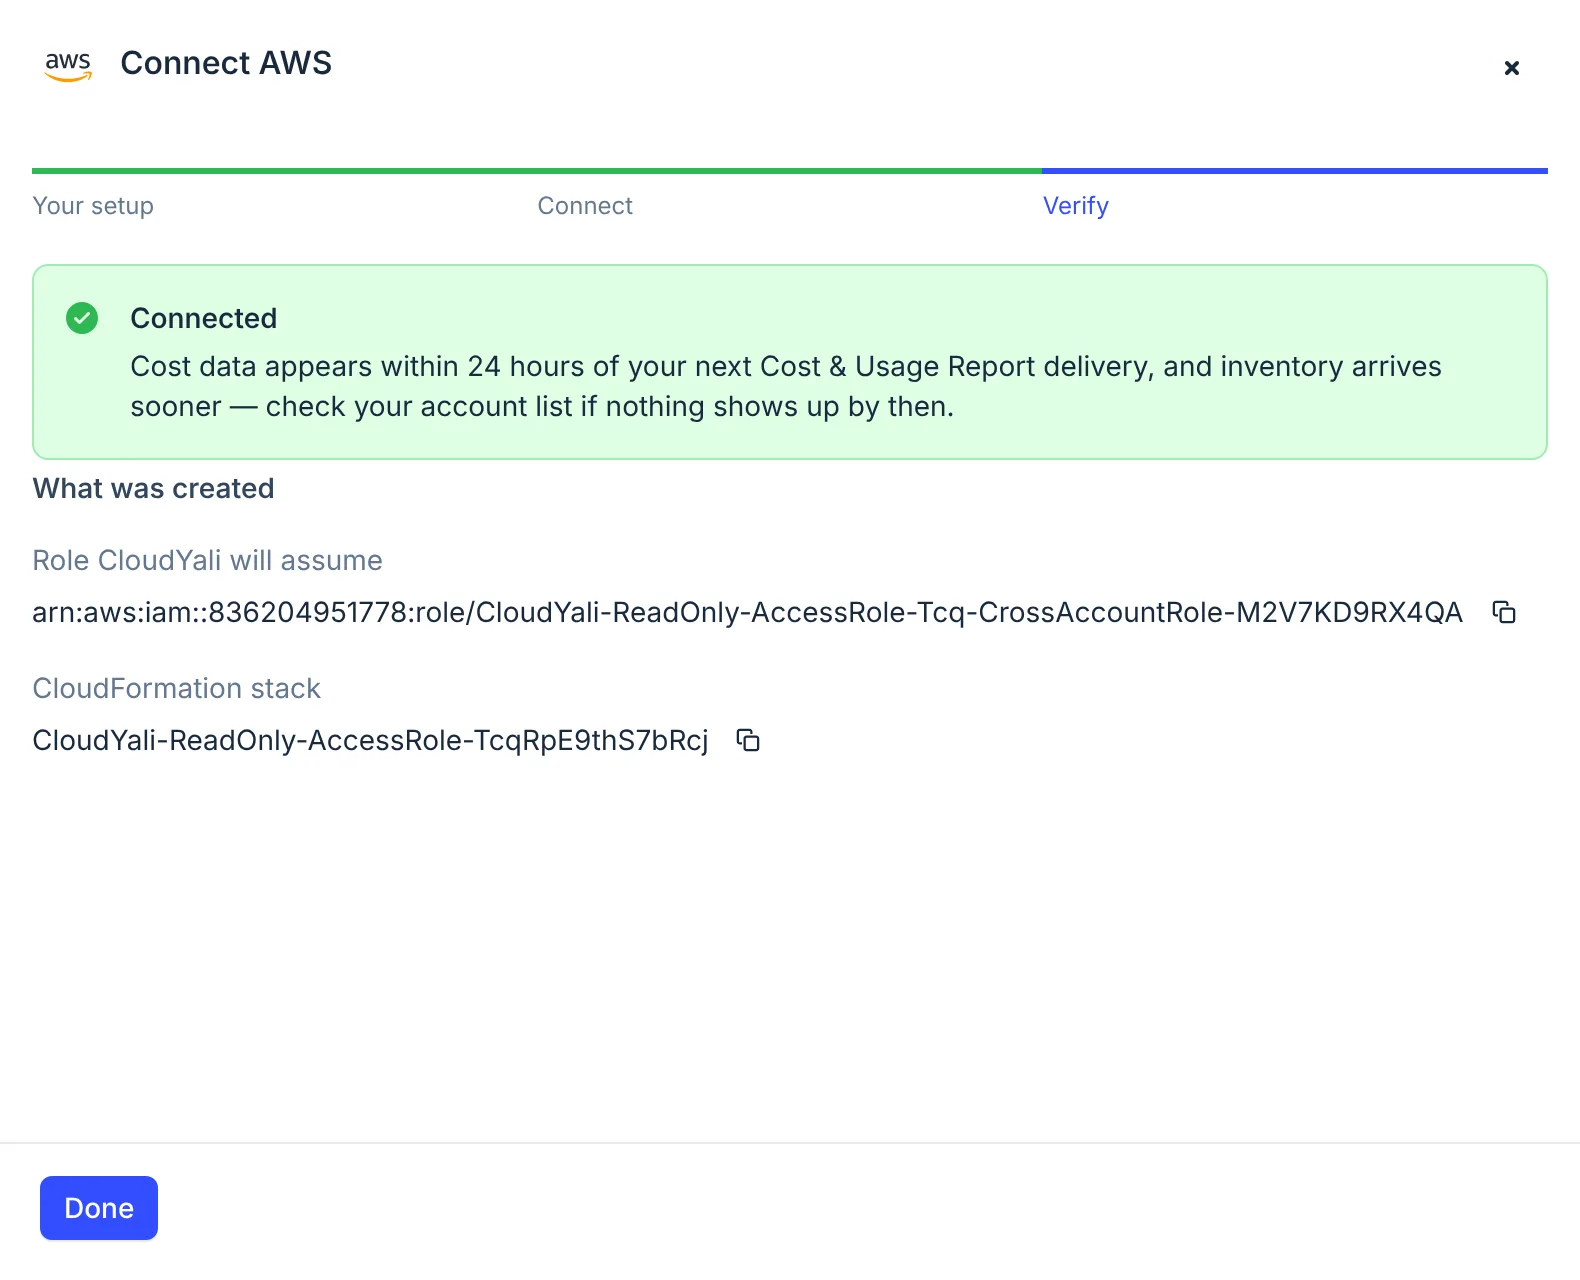
Select Done. The account appears on the Connected tab of Integrations. Resources follow after the first inventory scan, and cost within 24 hours of AWS's next delivery of the new Cost & Usage Report.
Replace a key or disconnect
There is no key to replace: CloudYali assumes the role, and the external ID protects it. To disconnect the account, see Remove an account.
Troubleshooting
| Symptom | Cause | Fix |
|---|---|---|
| Continue stays greyed out | The account ID is not 12 digits, or the name is shorter than 3 characters | Correct the field the console marks |
| CloudYali could not assume the role | The external ID or the role's trust policy was changed, or the stack was created more than 3 days after the link was made | Delete the stack, then connect the account again |
| AWS cloud account is already registered | The account is already connected | Find it on the Connected tab |
| The stack fails with AWS Cloud account is already onboarded in CloudYali | The account is connected to another CloudYali account | Remove it there first, or contact support@cloudyali.io |
| The console waits for more than 10 minutes | The stack failed, or it was created from an older link | Open the stack's Events tab in CloudFormation for the reason |