Google Cloud billing export and service account
CloudYali reads Google Cloud cost from the Cloud Billing export to BigQuery, through a service account you create. This page sets up both in one project, which you then connect in CloudYali. It takes about 15 minutes.
Before you start
- You need to be able to create a project, a BigQuery dataset and a service account, and to grant roles on the organization. If someone else holds the Billing Account Administrator role, ask them to do step 3.
- If you already export billing data to BigQuery, use that dataset and its project, and skip steps 2 and 3.
1. Choose a project and turn on the APIs
Use one project for the billing dataset and the service account, for example nw-billing. In
APIs & Services → Library, turn on the BigQuery API, the Cloud Asset API and the Cloud
Resource Manager API, or run:
gcloud services enable bigquery.googleapis.com cloudasset.googleapis.com \
  cloudresourcemanager.googleapis.com --project=nw-billing
2. Create a BigQuery dataset
- In BigQuery, next to the project, select Create dataset.
- Enter a Dataset ID, such as
billing_data. - Choose a multi-region location, US or EU.
- Leave table expiration off, so billing data is kept.
3. Turn on the billing export
- Open Billing → Billing export.
- Under Detailed usage cost, select Edit settings.
- Choose the project and the dataset from step 2, then select Save.
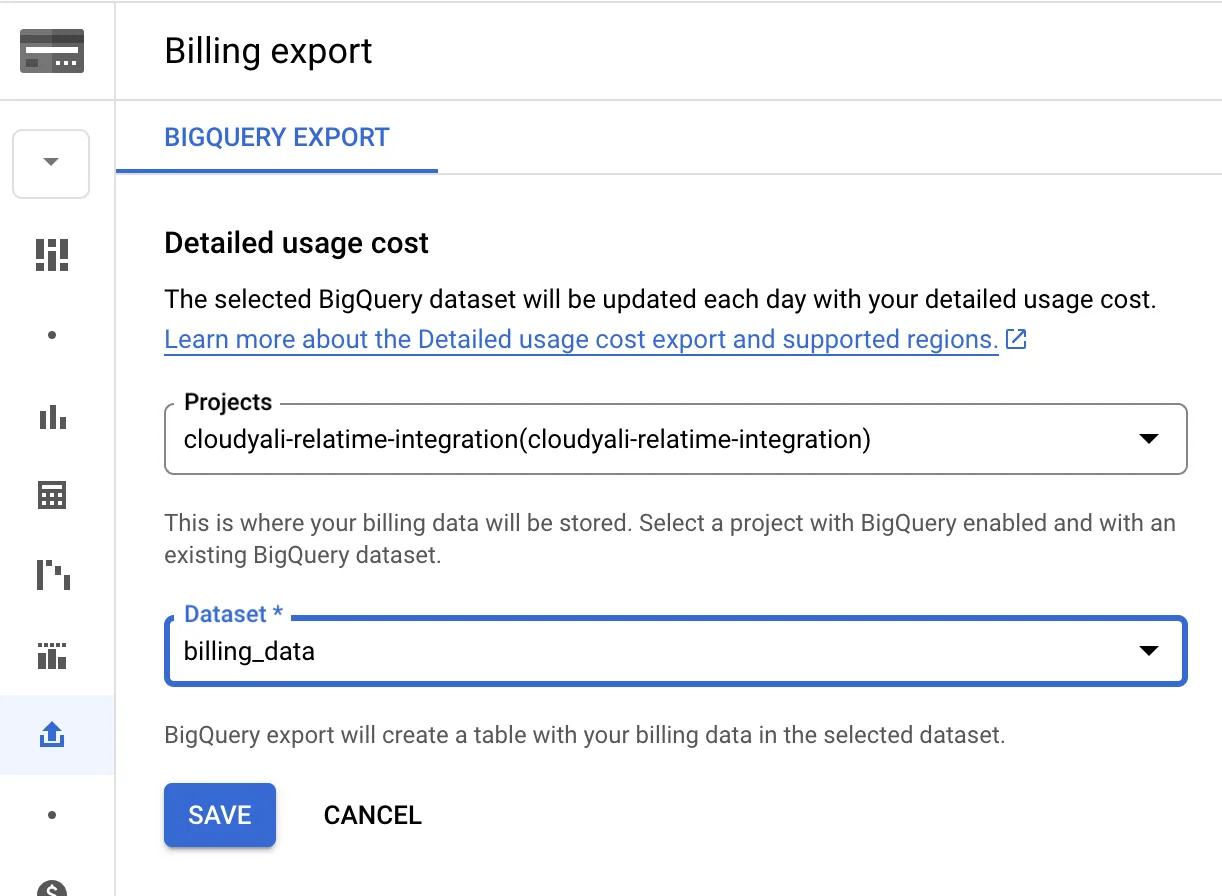
Google creates the table gcp_billing_export_resource_v1_<billing account ID> in the dataset. Its first
rows can take a day to appear. With several billing accounts, turn on the export for each one.
4. Create the service account and its key
- Open IAM & Admin → Service accounts in the same project and select Create service account.
- Name it, for example
cloudyali-reader, and select Create and continue, then Done. - In the service account's Actions menu, select Manage keys, then Add key → Create new key.
- Keep JSON selected and select Create. Google downloads the key file.
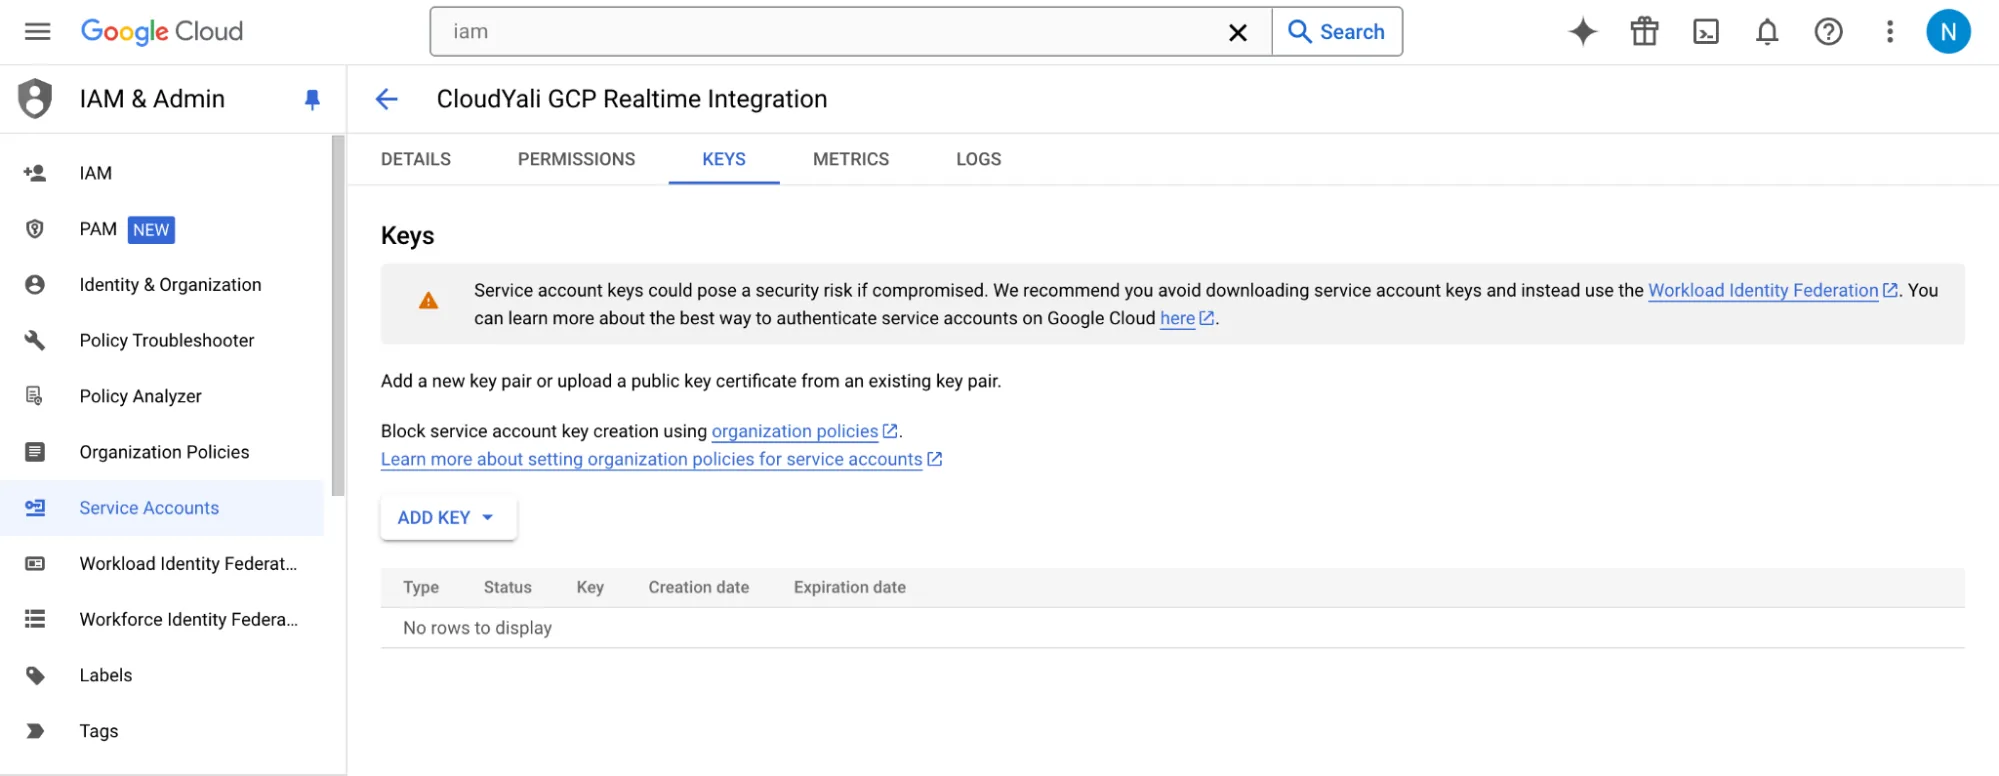
Keep the key file safe: it is the credential CloudYali uses. You upload it once in CloudYali, which does not keep it in your browser.
5. Grant the roles
Grant the service account the roles on Google Cloud permissions: BigQuery Data Viewer and BigQuery Job User on the project, and Cloud Asset Viewer and Browser on the organization. For one project only, grant Cloud Asset Viewer on the project instead of the organization.
6. Connect in CloudYali
Note the project ID and the table path, dataset.table, then follow
Connect Google Cloud.
Troubleshooting
| Symptom | Cause | Fix |
|---|---|---|
| The billing table is not in the dataset | The export was turned on less than a day ago | Wait for the first rows, then connect |
| Service account key creation is disabled | The organization policy iam.disableServiceAccountKeyCreation is on | Ask your organization admin for an exception on this project |
| A permission error right after granting a role | Google is still applying the change | Wait a few minutes and connect again |