Single Account Onboarding for AWS
At CloudYali, we take your security seriously and provide a secure way to connect to your AWS accounts. Our onboarding mechanism uses Cross Account IAM Role to interact with services in your AWS account, a method recommended by AWS for cross-account interactions. With this approach, CloudYali does not require your AWS access credentials, logins, or passwords, ensuring that your AWS account remains secure.
Prerequisites
Before you begin, make sure you have:
- Administrator Access to the AWS account to create IAM roles.
- The CloudYali CloudFormation template URL: CloudFormation Template (Note: Clicking the link may prompt your browser to download the template file).
Onboarding Steps
Step 1: Add AWS Account in CloudYali Console
- Log in to CloudYali and click on your username in the upper right corner of the console.
- From the dropdown menu, click on "Settings".
- Click on the Connect AWS Account button to launch the account onboarding wizard.
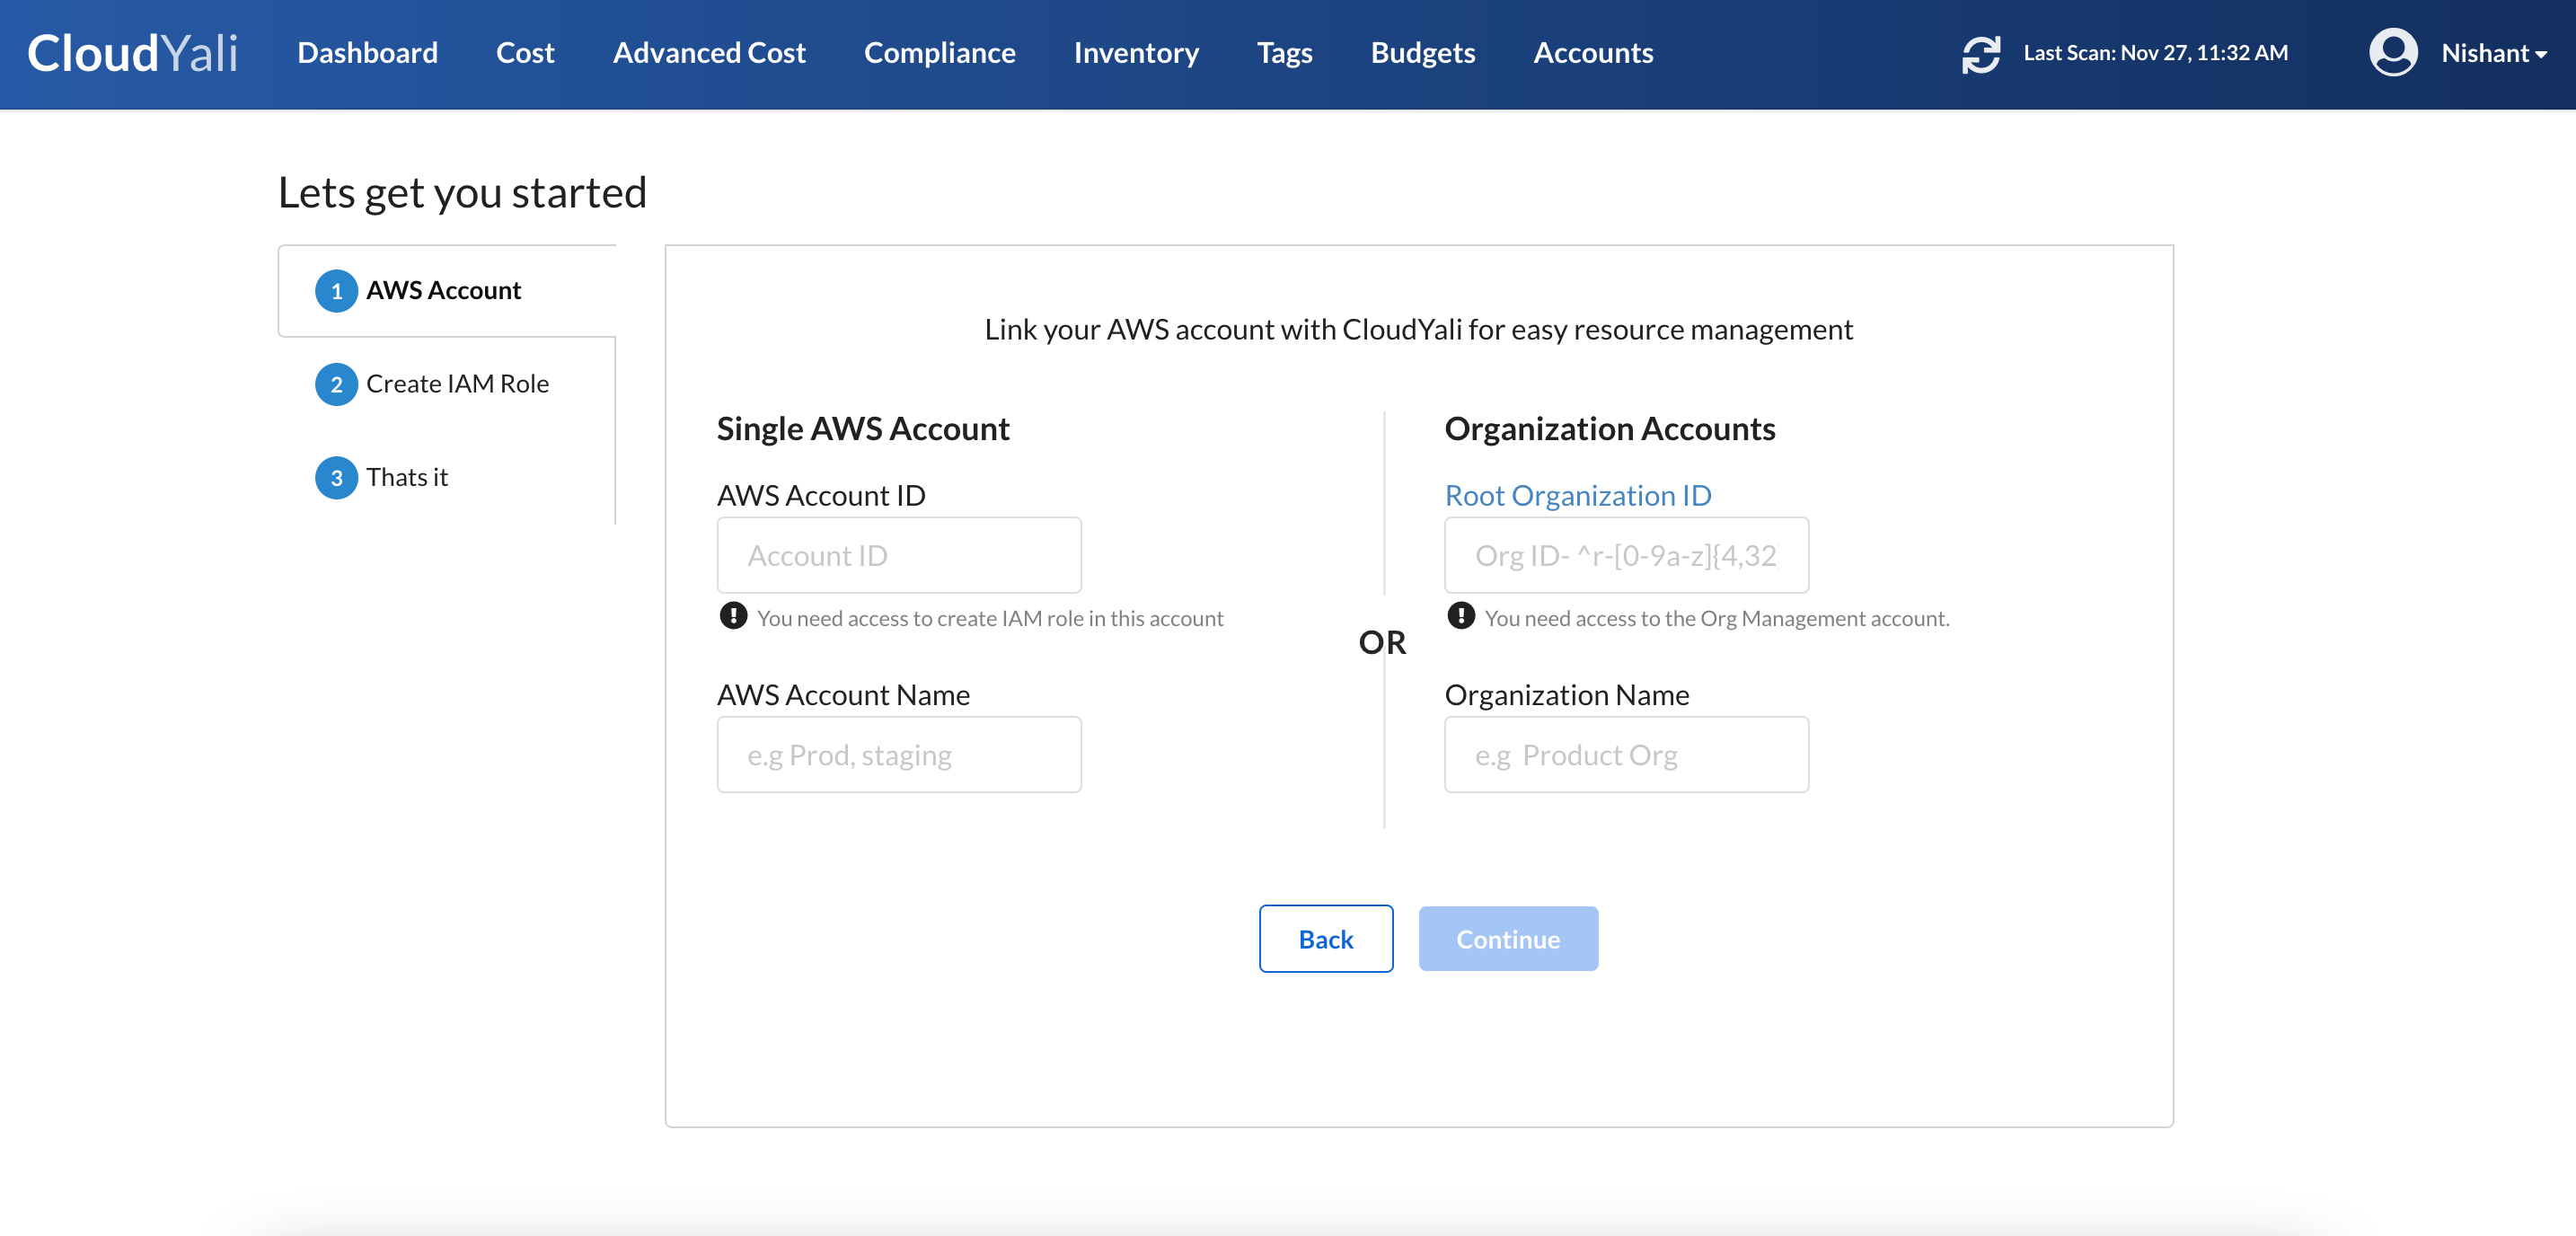
- For a single account, use "Single AWS Account" section and follow the onboarding wizard.

Step 2: Fill in AWS Account Details
- AWS Account ID: Enter the AWS Account ID that you want to onboard.
- Account Name: Enter a name for the account (do not use special characters, spaces, or underscores). This name should be used to identify your AWS account e.g. Production, Development etc.
- Verify Permissions: Ensure you have the necessary permissions to create an IAM role in the target AWS account.
Step 3: Launch CloudFormation Stack
- Copy the Generated Link: After filling in your account details, a link will be generated by CloudYali. This link will be emailed to your email.
- Log in to the AWS Console for the specified AWS Account ID.
- Paste the Copied Link into another tab of the same browser window used for the AWS Console. This will open the CloudFormation Stack Creation page.
- Verify the Stack Details but do not modify anything on the CloudFormation stack launch page.
- Click "Create Stack" to launch the CloudFormation stack.
Step 4: Wait for Onboarding Completion
- Return to the CloudYali Console: CloudYali will automatically detect the IAM role creation status.
- Once successfully onboarded, CloudYali will initiate a cloud discovery process.
- You can navigate to the Inventory tab in the CloudYali console to view discovered assets.
Note: It may take up to 10 minutes for the AWS account to show up in the AWS Accounts list. This process must be repeated for each AWS account you want to onboard, and there is no limit to the number of accounts you can add.
Viewing or Removing AWS Accounts
- View Accounts: Go to your user profile, click on "Settings" to view all onboarded accounts.
- Remove Account: Select the AWS account from the list and click on "Remove". Once removed, CloudYali will no longer sync with that account, and its data will be removed from the console.
© 2026 CloudYali. All rights reserved.